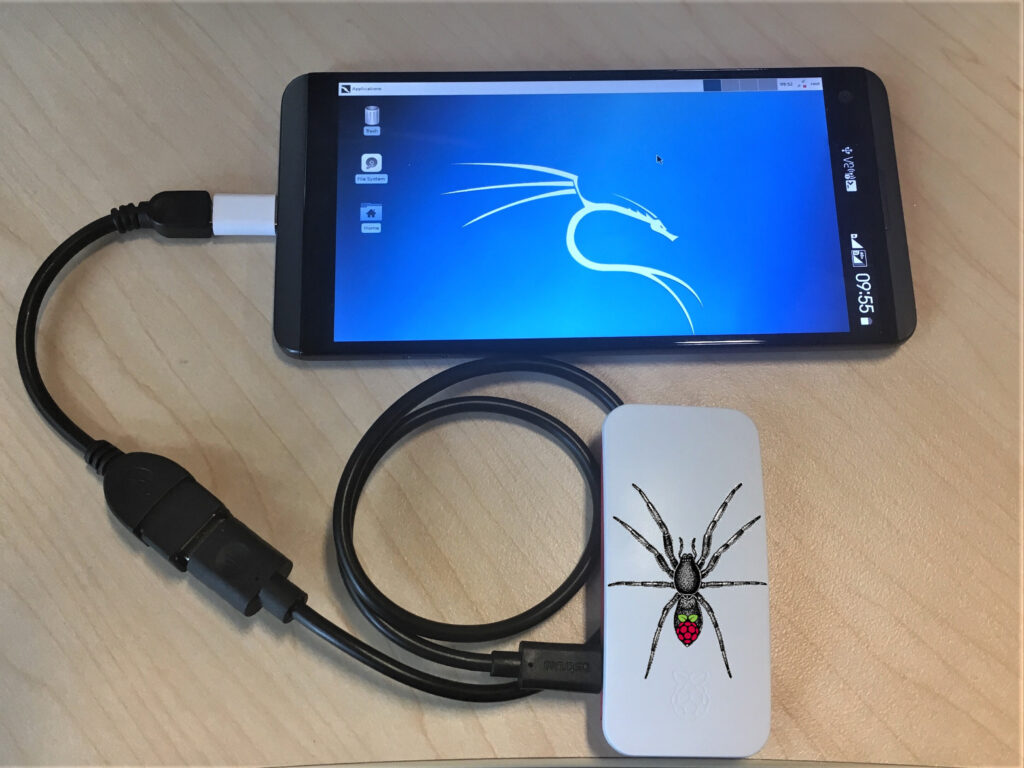
Running Kali Linux on a Raspberry Pi Zero is a fantastic way to create a portable, powerful testing device. This guide will walk you through setting up Kali Linux Pi-Tail on a headless Raspberry Pi Zero 2 W that is powered and controlled from a smartphone via SSH or VNC that provides a graphical interface to your Pi-Tail. I find it as of-the-shelf, cheap, portable and the smallest hacking lab that is fully controlled from any smartphone. Since controlling it doesn’t require you to have a keyboard, mouse or screen, it makes it a very convenient setup for Wi-Fi pentesting such as AP and clients scanning, deauthentication, WPS pin cracking, evil twin attack, capturing handshake and also network scanning and vulnerability assessment using nmap, brute-forcing, Bluetooth attacks, social engineering, running Metasploit framework, wardriving, web proxy using Burp Suite, using proxmark3, communicate with another Android using ADB commands, or even dynamically analyze iOS and Android apps using Frida.
How it works
If Kali Pi-Tail is connected to energy supply, it will automatically connect to predefined Wi-Fi networks that is broadcasted by a smartphone as a hotspot, allowing you to control it via SSH or VNC.
What You’ll Need
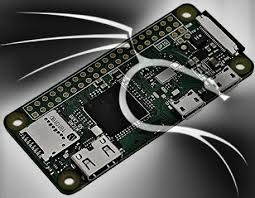
- Raspberry Pi Zero 2 W,
- microSD card (at least 16GB),
- OTG adapter,
- USB power cable or USB-A board add-on,
- Smartphone with SSH (Termux) and VNC (VNC Viewer for Android) apps installed. For some reason RealVNC app wasn’t able to connect to Pi-Tail,
- Kali Linux Pi-Tail image.
Step-by-Step Setup
1. Download and Prepare the Kali Linux Pi-Tail Image
- Download the Pi-Tail image from the official Kali Linux website.
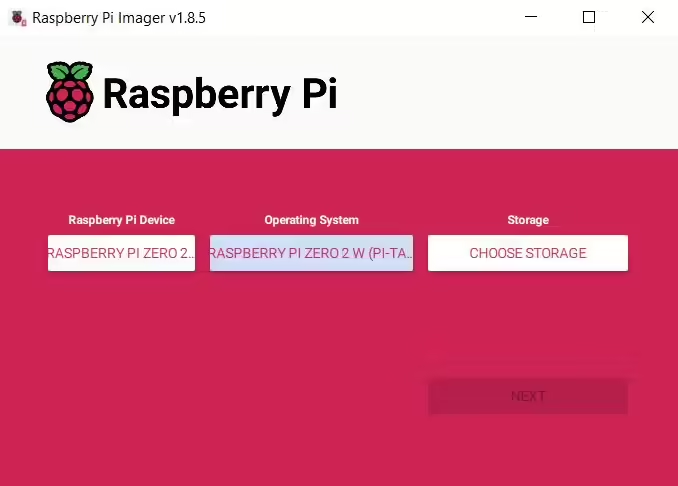
- Use Raspberry Pi Imager to write the image to your microSD card.
- From Operating System select
Other specific-purpose OS->Kali Linux->Raspberry Pi Zero 2 W (Pi-Tail)
- From Operating System select
2. Insert the MicroSD Card and Power Up
- Insert the microSD card into your Raspberry Pi Zero 2 W.
- Connect the OTG adapter to your smartphone and the USB power cable to the Pi-Tail to power it up.
3. Configure Your Smartphone
- Enable the hotspot on your smartphone with the SSID
sepulturaand passwordR4t4m4h4tt4. - Install the Termux (for SSH) and alternatively VNC Viewer for Android app on your smartphone.
4. Connect to the Pi-Tail
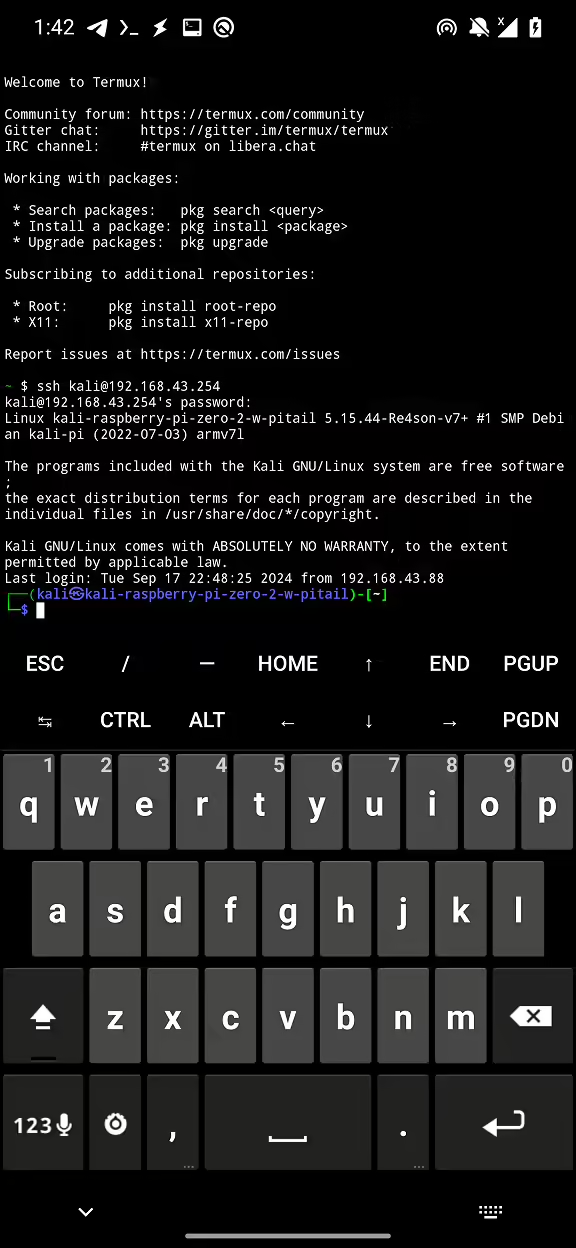
- Open Termux app and connect to the Pi-Tail using the IP address 192.168.43.254 with the username
kaliand passwordkali.
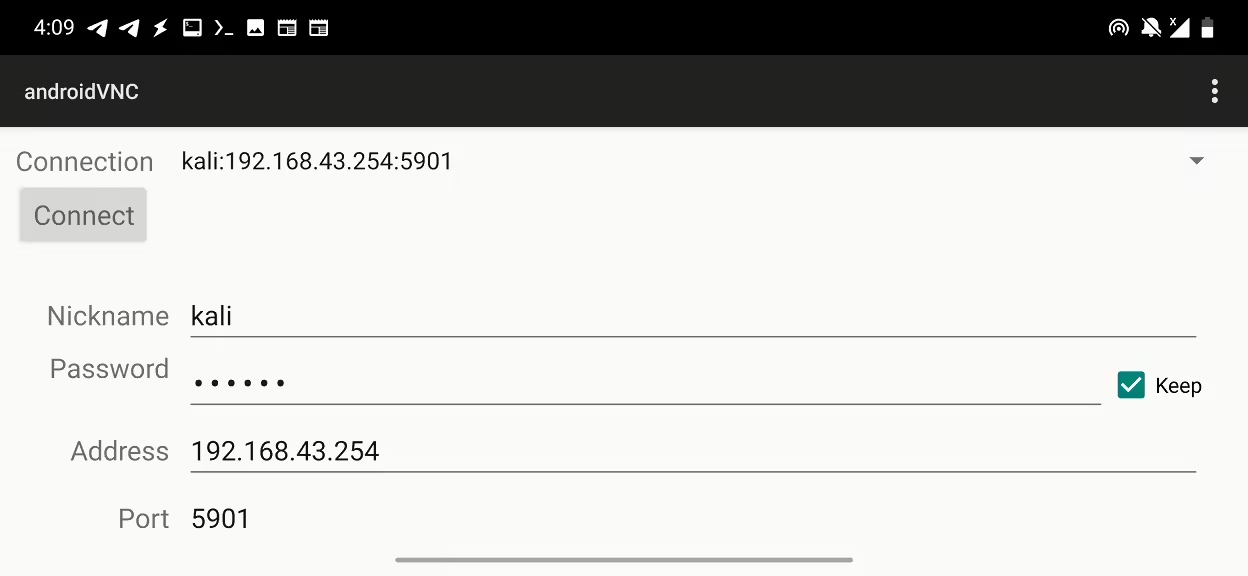
- For VNC, start the VNC server on the Pi-Tail by running
sudo vncserver -localhost no. When requested, create a password that you will need for VNC connection. Now to connect to it, use VNC Viewer for Android app with 192.168.43.254:5901 IP address andkaliusername with the password you created.

5. Update and Upgrade Kali Linux
Once connected via SSH, update and upgrade the system:
sudo apt-get update&&sudo apt-get upgrade- Since most likely your
sepulturahotspot doesn’t have an internet connection, you can plug in an external Wi-Fi adapter into Pi-Tail and use it to connect to access point with internet access. - Alternatively, you can pull out the microSD card and plug it into another device such as Raspberry Pi and update or install additional software.
The Pi-Tail setup is highly portable. Your smartphone acts as the power supply, screen, keyboard, and mouse, making it an excellent field companion for penetration testing.
Connect to additional access point
Connecting to an additional Wi-Fi network requires an extra Wi-Fi adapter. This is particularly useful when you need either an internet connection or want to run network scanning tools like Nmap on different network simultaneously. For convenience, you can use a script below that connects to a network based on its name and password.
#!/bin/bash

# Check if two arguments are provided
if [ "$#" -ne 2 ]; then
    echo "Usage: $0 <wifi_network> <password>"
    exit 1
fi

wifi=$1
pass=$2

sudo service NetworkManager start &
sudo ifconfig wlan1 up
sudo nmcli dev wifi connect $wifi password $pass ifname wlan1
Kali Pi-Tail case
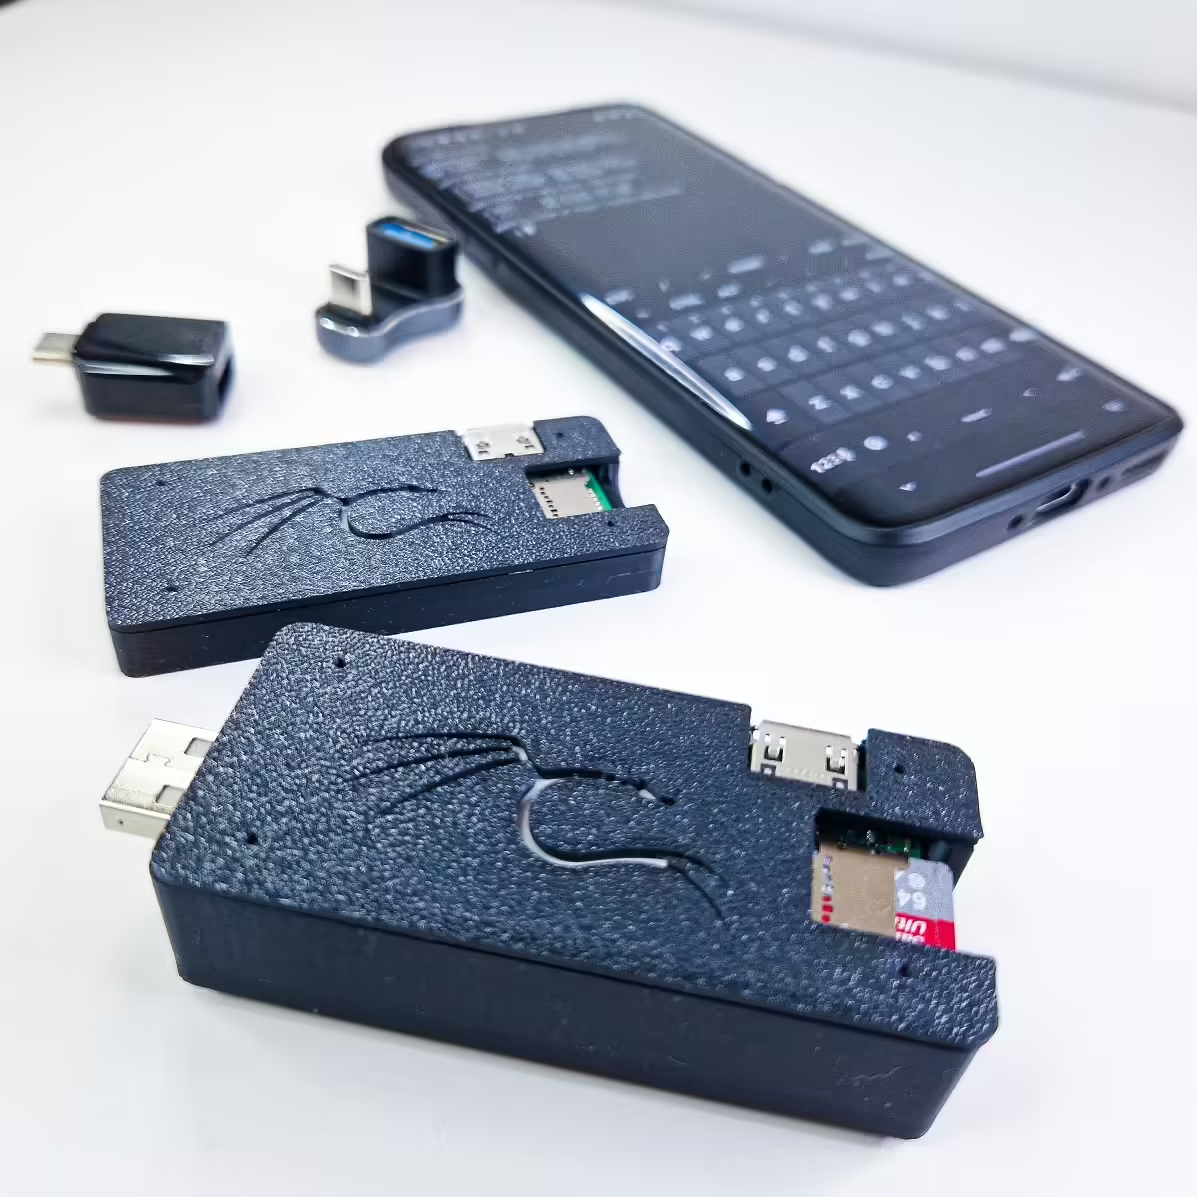
A good case makes it easier to carry around and use, keeping everything safe and stylish wherever you go. You can print a 3D case designed and published by 4x0nn available for download at Odysee.
When I added a USB-A board, I had to adjust it a bit to made it little thicker and add an opening for USB.
If you found this blog helpful, feel free to share it with your friends or on your social media platforms. Spreading the word helps us create more content like this and grow the cybersecurity community together!
👉 Join our Telegram channel for exclusive content and updates: Telegram Channel
📸 Follow us on Instagram for daily hacks, tutorials, and behind-the-scenes content: Instagram
🌐 Interested in hacking courses? Visit our website to explore in-depth, practical cybersecurity courses and resources: https://hackwarden.in